With every Thanksgiving – heck, with every family feast day – comes the spectre of lumpy, odd-tasting or just really awful Gravy. In answer to several inquiries I received in the past 48 hours, I feel it is my duty to share my Chef Secrets for Perfect Gravy. It’s just the right thing to do…
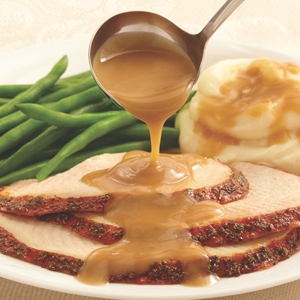
 Perfect Turkey Gravy. Velvety smooth, golden brown and delicious!
Bad Gravy can ruin a special dinner. And no gravy (because you blew it) is like a day without sunshine. So let’s all get on the same page, here, and pledge to end bad Gravy forever!
What I do…
The first thing I do when making Gravy is to pour- or spoon-off excess fat from the drippings (jus). You need some fat to make good Gravy, but any that’s floating on top of the jus is excess.
Next, I put some heat on under the pan and wait until the drippings begin to bubble – a nice simmer.
Then, I mix up a Slurry of a Starch and a Cold Liquid. I usually use Cold Water, a third to half a cup of which I pour over a couple of tablespoons of Flour or Corn Starch. Use Flour for a conventional Pan Gravy, Corn Starch if you want a translucent Gravy with a high gloss. The Gravy will taste the same, either way. I use a fork to beat the Starch into the Liquid until it’s fully dissolved and milky in consistency. Never, ever, just throw Flour or other Starches directly into the Drippings. That’s a ticket to Lump City!
With the drippings simmering, I pour the Slurry into the pan and start to stir. You can use a fork, a spoon or a whisk. I always use a whisk to optimize the smoothing effects of my stirring labours. You must stir continually until the Gravy thickens – perhaps a minute or so. Here’s an essential Chef Secret: Let the thickened Gravy continue to simmer on low for 15 or 20 minutes to ensure that the pasty flavour from the Flour cooks out. Always add Cold Slurry to Hot Drippings. Or you’ll get lumps, for sure!
Taste for Salt and Pepper, adjust the seasonings, if necessary, and serve.
Finally, just before serving, pour the Gravy through a sieve into the gravy boat or bowl. this will remove any lumps or bits of roast debris remaining in the Gravy.
Some Quick Fixes…
So… You’ve got lumpy Gravy. Just sieve out the lumps and check the consistency of the Gravy you have left. If you need a thicker Gravy, bring it back to that nice simmer and add some more slurry, making sure the Liquid is very Cold and the Starch is thoroughly incorporated. Add the Slurry a slurp at a time, stirring constantly, until you have the thickness you want.
Your Gravy tastes too Salty? It can happen easily, if you add Salt to the Drippings before you add the Slurry and taste.You can take the edge off a too-salty Gravy by adding some Cream. Any percentage is fine. Just add it in slurps, stir and taste until the flavour smooths out. Don’t add too much, though, or your gravy will turn into a ‘delicately flavoured’ Cream Sauce!
You’d be surprised how often people over-thicken their Gravy. It’s not a capital offense! And you can make restitution by simply adding some extra Stock. I always keep Stock in bags in the freezer for just such occasions. You can always use Stock In A Box from the supermarket, too. Chicken Stock is fine for any Poultry and Pork. Beef Stock is, naturally, the choice for Beef. Veggie Stock is best for Ham and other meats. The result, either way, will be a richer-tasting Gravy, and more of it than you expected. Don’t worry about having excess gravy. You can always use it as a rich base for Stews, Pot Pies, Open-Faced Sandwiches and other creations later in the week, when you’re trying top use up the other leftovers.
Your Gravy can sometimes come out weak and watery, too. If so, add Stock and re-thicken as with lumpy Gravy. Be sure to taste for Salt and Pepper before serving. Too little is as bad as too much.
So, you see?
There’s really no such thing as ‘ruined Gravy’. You just have to know how to handle the situation!
~ Maggie J.