Sticky situations demand slick solutions. Or, at least, some kind of… release! There are a number of ways to ensure that your favourite dishes don’t stick when you try to take them out of the pan, each appropriate to the pan you’re working with.
The “Non-stick” myth
There’s really no such thing as “non-stick” cookware, regardless of what the ads and the Shopping Channel say. At least, not after the first time you overheat it and the coating breaks down. Not only does that ruin the no-stick, it can release toxic chemicals. There are some new coatings and ceramic finishes that last longer, but they all eventually get scratched or chipped and that’s it for the “no-stick” promise. It’s all downhill and frustration from there. At least in my experience.
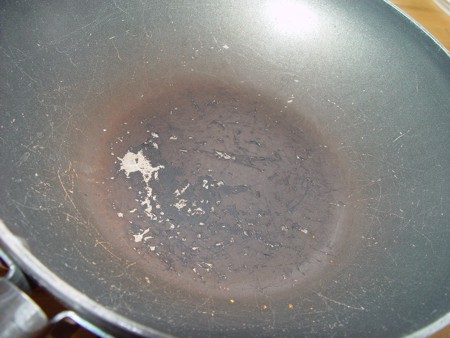
 An second-generation (post-Teflon) no-stick pan. It still scorched, then scratched,
then chipped and peeled. And was less use, in the end, than a plain, uncoated pan.
But “non-stick” cookware has only been around since the 1970s, when Teflon first appeared. What did people do before that?
Pan Frying and Searing
There are a few important but simple rules for stick-proof frying.
First, use an oil that has a high heat tolerance. Canola is relatively neutral and colourless and can even be used to deep-fry. Corn Oil and Peanut Oil are also good performers in the fry pan. But they have distinctive flavours you may not want, and Peanut oil is crazy-expensive… Olive Oil, Lard and Butter fare less well, though. In fact, they burn easily at temperatures approaching medium. Butter has milk solids which makes it particularly touchy.
Here’s an old Chef’s trick: Use half butter and half high-heat oil to get that butter flavour you want without the risk of burning. but still watch your heat! Same thing with Olive Oil. Half Olive plus half Canola will give you the Olive Oil flavour you’re looking for in Mediterranean dishes without scorching.
When browning, searing or frying meats in a hot pan, always make sure that the Oil is very hot before adding the meat. You want to hear a spirited sizzle when meat touches pan! That means that the meat will brown and crust up quickly and cleanly. Now… Don’t play with the meat while it is in the pan. Just let it sit for 3-4 minutes per side. It will stick to the pan at first, but it will release from the pan all on its own when it’s done searing. Making sure the Oil is good and hot before adding the food will also cut down on the amount of Oil absorbed by the food and the amount of moisture (and tenderness) lost to cooking.
Baking
When baking a cake, or anything in a high-sided pan using a wet, pourable batter, rather than a stiffer dough, always grease the bottom and sides of the pan with Butter or Shortening and then throw in a couple of tablespoons of Flour. Shake it around until some Flour sticks to all the buttered surfaces. Cakes, Muffins Brownies and Quick Breads will pop right out after a few minutes of cooling following removal from the oven.
When baking dough-based items, like Bread or Dinner Rolls, just grease the pans well.
When baking freestanding loaves or rolls on a flat sheet pan, use a sheet of parchment paper. This stuff finds many uses in the kitchen and can really simplify your life at clean-up time! But you must know and appreciate the difference between parchment and waxed paper! They look similar, but you can’t substitute waxed for parchment. Waxed paper will melt when exposed to heat and make a worse mess than if you had used nothing at all. At worst, parchment will singe a little around the edges. Parchment paper is available at baking specialty shops and most supermarkets, in a handy roll.
And don’t forget to use cupcake liners when making anything batter-based in cupcake tins. You’ll be glad you did!
You can also use pieces of parchment paper cut to fit the bottom and sides of any baking pan. This is especially useful when dealing with spring-form and removable-bottom pans, or making something like an Upside-down Cake or Sticky Buns which are baked gooey side down and turned upright when they come out of the pan.
Pastry
Any short-pastry dish can be baked without any special treatment to the pan. It will have more than enough If you expect the filling to ooze out, under the crust, you can lightly grease the pan just in case.
Though it’s not absolutely necessary, I like to bake freestanding pastries, such as Turnovers, Danishes, Croissants or Strudels on a sheet of parchment paper. The filling may ooze out and I hate cleanup time as much as anyone!
Casseroles and other saucy creations
You can hardly go wrong using the grease-and-flour method to prepare the pan for any saucy casserole, especially gooey, creamy, cheesy ones such as Mac & Cheese and Scalloped Potatoes.
For Lasagna or other dishes using non-cream sauces, just spread a layer of the sauce in the bottom of the pan before adding any other ingredients and let ‘er bake. The moisture in the sauce (or gravy) will keep the dish from sticking.
For casseroles using no bottom crust, such as Shepherd’s Pie or Pot Pies, no special treatment is necessary. The sauce/gravy will lubricate the dish perfectly, unless you over-cook it or bake it at to high a temperature and burn the filing on the bottom. Hint: I always like to bake casseroles at 350 F and let them go as long as it takes for the filling to be properly done and the topping beautifully browned. Even 375 F can cause the topping or crust to burn on some dishes before the filling is done.
If I’ve left anything out…
…comment on this post or email me via info@maggiejs.com. I’ll gladly issue an update!
~ Maggie J.
I am so grateful for your article. Much obliged.
Wow, awesome blog article! Really! Looking forward to read more. Awesome.
I have been reading your food blog and noticed that you didn’t mention that favourite standby of all us lazy cooks for non-stick baking pans, Pam and Pam with flour added. I know that for a professional chef that is not the way to go but for us amateurs it seems to work well enough.
I have no fundamental quarrel with Pam and other cooking sprays. After all, they’re just vegetable oil in a can! When I worked in the kitchen at a local homeless shelter, we fed more than 400 people three times a day and needed all the convenience we could get. We always used Pam-type products to oil the flat-top griddle and it worked like a charm! What I don’t like about aerosol oil products is a.) their cost compared to plain old oil – “the cost of convenience” – and b.) the damage that aerosols may be doing to the environment. One final word: I always dust the grease (whatever kind I use) with flour when prepping baking pans! One of the greatest tips I ever got!