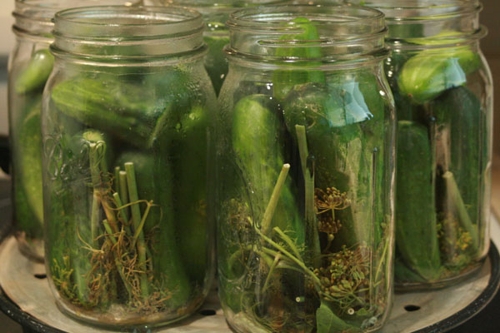
Now, I have previously mentioned that Dill Pickles were not necessarily a staple of the preserve cupboard when my Mom was a little Girl on a farm on the Prairies. But some folks grew Dill in the house garden especially for pickling, and every Mom at that time had her own recipe…
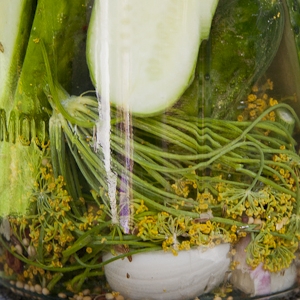
 New Dill Pickles, waiting for their liquid top-up. The Dill Fronds in each jar
are complete with Blossoms, an extra treat for Pickle aficionados…
The Prairie folks who went to the trouble of planting Dill to make sure they had it in the pantry were, more often than not, Immigrants from Eastern Europe who were used to having many things around that my mom’s Scottish family had never heard of. Another such ingredient was Garlic. But we’ll get to that a little later.
The Basics…
You can use a commercial Pickling Spice Mix. It comes in a bag at the grocery store in the Herb and Spice section, But you’ll also need to add extra Dill Fronds. That’s usually available in the Fresh Herb section in Produce.
If you make your own Spice Blend, use:
- 4 cup / 1 L White Vinegar
- 3 large Onions (Sweet, White or Spanish, per your taste)
- 1 cup / 250 ml White Sugar
- 1/2 cup / 125 ml Salt
- 6 Whole Cloves
Now, wash and cut your pickles
You may use 12 large (say, 5 in. / 10 cm), 18 medium or 24 small Pickling Cucumbers.
You can use small or Medium Cukes whole, if you wish. Large ones should at least be halved lengthwise. I prefer quartering them lengthwise. Some folks prefer to slice the Cukes crosswise, making Pickle ‘coins’, while others slice them thin, lengthwise to form strips ideal for sandwich stacking. Indulge yourself. Maybe make part of your batch one way and part(s) another.
The Old Way…
Mom’s High School Cookbook has the recipe for tender, juicy Dills. Sprinkle the Spice Mix over the Cukes and let them sit overnight. In the morning, Drain off the water that’s oozed out and cook the Cukes (with the Spice Mix) until tender. This also opens them up to absorb the Pickling juice. The better they absorb the Juice, the longer they’ll keep.
Pack the pickles tightly in jars sterilized per the method in Pickling Basics. Include a Dill Frond or two in each jar. Put the hot Pickling Liquid over the Cukes, filling each jar to about half an inch / 1.5 cm Below the rim. Portion out the Liquid equally to all the jars. Top them up with boiling water if necessary. Put lids and Rings on while the Liquid is still hot and hand tighten. Let the jars cool at room temp. Store in a cool, dark place.
The New Way…
If you prefer crispy, crunchy Dills, use this method:
Boil the Spice Mixture in 6 cup / 1.5 L of water until the sugar and salt are fully dissolved. Set aside
Fill the sterilized jars per The Old Way, but with raw Cukes. Pour the Hot Spice Mixture over the raw Cukes, portioning it out equally over all the jars. Fill the jars up to 1.2 in. / 1.5 cm below the rim with boiling Water if necessary. Cap and cool as per The Old Way.
How long before they’re Pickles?
The Old Way Pickles are ready pretty much out of the cooking pot. But they’ll get better and better the longer they rest in the brine. Mom always said, “Hands off the Pickles until they’re at least 6 weeks old!”
The New Way Pickles need longer for the Pickling Brine to seep into the Cukes, but you can start eating them 8 to 10 weeks after bottling. I say, three months.
If you want Garlic Dills…
Add one or more whole Garlic Cloves to each preserving jar, according to your taste. The longer the Pickles rest, the more Garlicy they’ll get, and the less ‘insistent’ the Garlic flavour will be.

