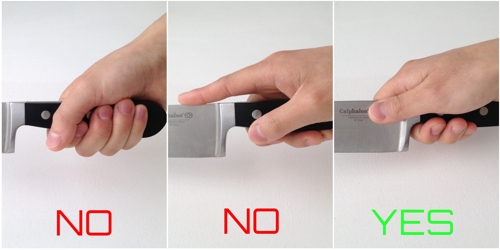
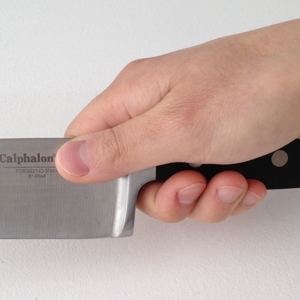
Last time on ECT we introduced you to the single most indispensable requirement for any serious cook: good knife skills. Today, we’ll continue with some more details about how to achieve them. And we’ll start at the very beginning with how to hold your knife properly…
 The proper grip on your knife will help you make clean, consistent
cuts… Not to mention reducing the chance of injuries.
For this, I refer you to the photo array above. And I heartily recommend you detour momentarily to my earlier post about how to Use Your Good Knives Properly.
Now that we have the foundation laid, let’s examine some of the classic knife cuts and look at why they’re used.
More tradition than anything else – or is it?
Certainly, many of the classic French knife cuts are associated with traditional presentations (appearances on the plate) and dish styles. Many even have French names! But there are also practical reasons for slicing, dicing and julienning; chopping and mincing; and ‘chunking’.
First, we often cut foods into uniform sizes to ensure that all pieces will cook at the same rate. Thicker foods take longer to cook than thinner ones. If you don’t have all day to cook the potatoes, cut them in smaller pieces before tossing them in to the pot and they’ll cook faster.
We also take into account how the dish will be eaten. For instance, you can serve whole Chicken parts, large slabs of Roast Meat or big chunks of Root Veggies when preparing a full plated meal where knives and forks will be in play, but Soups and Stews call for smaller pieces which can be conveniently handled with a spoon.
Practice makes perfect…
Don’t be discouraged if your early efforts at classic knife cuts are less impressive than what you’ve seen on the TV cooking shows. Those celebrity chefs have had thousands of hours of practice starting when they were newbies just like you. And you’re not racing the clock they way they do when making a TV show! Take time to make your knife cuts as precise and consistent as possible. You’ll just naturally get faster at it as time goes on. I’ve come to the point that I often just go ahead and do something manually with my knives rather than going to the time and bother of setting up the food processor or some other appliance to do the job.
Basic safety rules…
Number one: Always use a sharp knife. Most knife injuries stem from blade slippage, and blade slippage usually only occurs when the edge is dull and slides on the surface of the food rather than cutting into it. Use a Steel (the big file-like thing that comes with most knife sets) to dress the edge of your knife before every cutting session to enhance your own safety. I often employ a ceramic sharpener which uses carbide discs to dress the knife edge at the ideal 12.5 degree angle.
Number two: Always hold the food firmly – but not so hard that your fingers turn white! And be sure to tuck your fingers under so the knife blade moves up and down on your knuckles and your finger tips remain clear of the cutting edge.
Number three: NEVER try to catch a falling knife! You’re just asking for an injury. Remember – you’re a cook, not a circus performer.
Number four: Always store your knives in a wooden or other appropriate knife block. And get a block that has horizontal, rather than vertical slits for the knives. No matter what material your block is made from, your knives should NEVER rest on their blade edges. That’ll just dull them and age the blade faster. When travelling with your knives, or if you must store them in a drawer, always protect the blades with inexpensive hard plastic sheaths which you can get at any cookware store. And who in their right mind would want to plunge their hands into a drawer full of bare-bladed sharp knives?
What’s next?
We’ll follow up in a day or so with some Chef secrets for streamlining common slicing and dicing tasks…
~ Maggie J.

